
Creating an ASN
To create a new ASN - navigate to Warehouse > Goods In > Create ASN

On the first screen you can enter a purchase order number (PO Ref) or just a general reference for the delivery (supplier name etc)
Then enter the estimated delivery date of the delivery.
At this point it is only an estimation of the delivery date, nearer the time this can be modified by warehouse admin users when delivery is actually booked in.
Finally you must select the delivery type - either carton, pallet or container and the qty of either expected.
It is not critical that the delivery quantity of pallets or cartons is accurate at this point as warehouse admin users can amend at point of book-in.
When finished entering details about the delivery type - click Next.
Add Products to ASN Manually
You will now need to enter the products for the delivery.
You can either scroll through all products, or start typing the code and it will bring all similar codes up to choose from, like below:

Select the product required & the QTY - then click add.
If you make a mistake, you can scroll down the screen to view items added to the ASN where you can either amend QTY or delete the item from the ASN:

You can also choose to create new SKU's if the goods are not already setup on the OMS system for this delivery.
Simply type the new SKU code in and alter qty then click add:

Missing Attributes
Where deliveries contain new SKU codes - warehouse admin users must complete the important missing attributes when booked in, such as Weight, Description & Bar-code
Upload Products to ASN Via CSV
If you have a large list of SKUs to upload - hit the upload items tab & download the CSV template:

Then fill out the fields as necessary - existing products will only need the SKU & QTY populated, but new SKUs we would recommend to include more attributes such as name & weight etc.
Confirm ASN
When you have finished populating all items in the ASN and ready to submit, just click Confirm ASN:

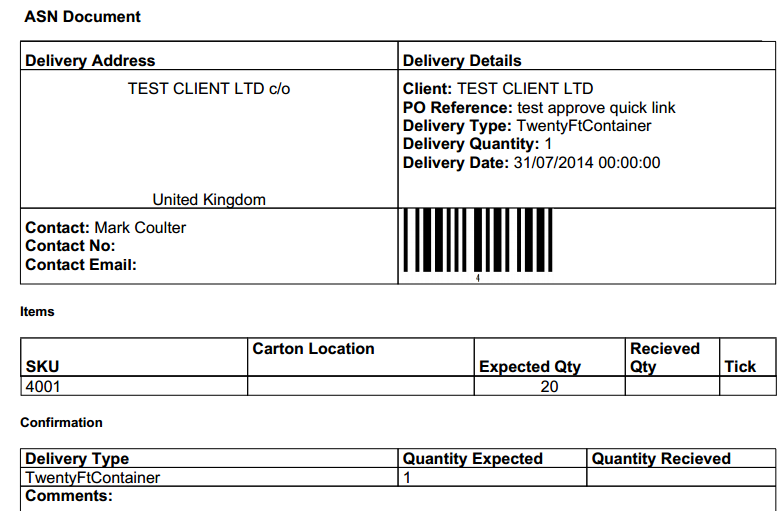
ASN Paperwork
Generate PDF!
You should now choose to Generate ASN PDF, and email this to your supplier to attach to the physical goods when delivered!

This contains everything that is needed for both your supplier and the receiving warehouse for the delivery:
Once the ASN is confirmed this delivery will now appear in your calendar.
Managing & Editing ASN's
Up until a delivery is received - either warehouse or admin users have the facility to change and amend the details of the ASN, by simply clicking on the delivery from the calendar.
Or alternatively by using left hand menu and navigating to Warehouse > Goods In > ASNs > Actions > Manage ASNs, then clicking manage ASN on the right hand side:

You can then change & update all the info on the ASN and amend or add products and save the changes.
You can also choose to delete ASN's that have not been received yet by clicking the delete option from the Action button.
Adding Attachments to ASN
Additional functionality now allows attachments to be add to an existing ASN.
On the Manage ASN Screen, going to the Attachments Tab will allow the user to upload a selection of documents, view existing documents and download them. Documents can also be deleted from here.

